How to Use an RV Dump Station Step by Step
In this guide
Dumping an RV’s holding tanks is a ten-minute job with one rule that matters more than all the others: empty the black tank first, then the gray tank, so the gray water rinses the hose. Everything else is setup and cleanliness: gloves on, both hose ends secured before any valve opens, watch the hose while it drains, rinse with the station’s non-potable hose, and never touch the drinking-water fill with anything that has been near the drain.
This guide gives the procedure in order, what to carry, how to find stations and what they cost, the chemicals question, and the short list of things that must never go down the drain. The steps follow the City of Carpinteria’s published RV dumping guide (May 2024), Thetford’s equipment manuals and the instructions posted at state and national park stations, as read in October 2026. Your RV’s owner’s manual overrides anything here on valve layout and tank-flush fittings.
What you need in the bay
| Item | Why |
|---|---|
| Sewer hose, 15 to 20 ft, with bayonet fitting | Standard three-inch connection to the RV’s outlet |
| Clear elbow or clear section | Lets you see when the flow runs clear |
| Hose support (cradle) | Keeps a downhill slope so the hose empties |
| Disposable nitrile gloves | Everything on this side is contaminated |
| Dedicated rinse hose (not your drinking-water hose) | For tank flush and hose rinse; store it separately |
| Tank treatment packets or liquid | Added after the dump, with a few gallons of water |
| Paper towels, hand sanitizer, a small spill kit | Carpinteria’s guide lists absorbent, gloves and glasses |
| Weight (a rock, or the station’s lid) to hold the hose in the drain | Prevents the hose jumping out when the black valve opens |
Keep the sewer kit in its own sealed tub in the bumper or a bay, never with the fresh-water gear. Our RV travel day checklist puts the dump at the end of the departure sequence, before you leave the campground.
The procedure, step by step
- Pull in so the RV’s outlet is within hose reach of the drain and slightly uphill of it. The outlet is usually on the driver’s side, near the rear axle. Leave the engine or truck running only if the station requires it; otherwise shut down and set the brake.
- Gloves on. Confirm both tank valves are closed. Then remove the cap on the outlet. A little drip is normal; a gush means a valve is leaking and you should have the hose on first next time.
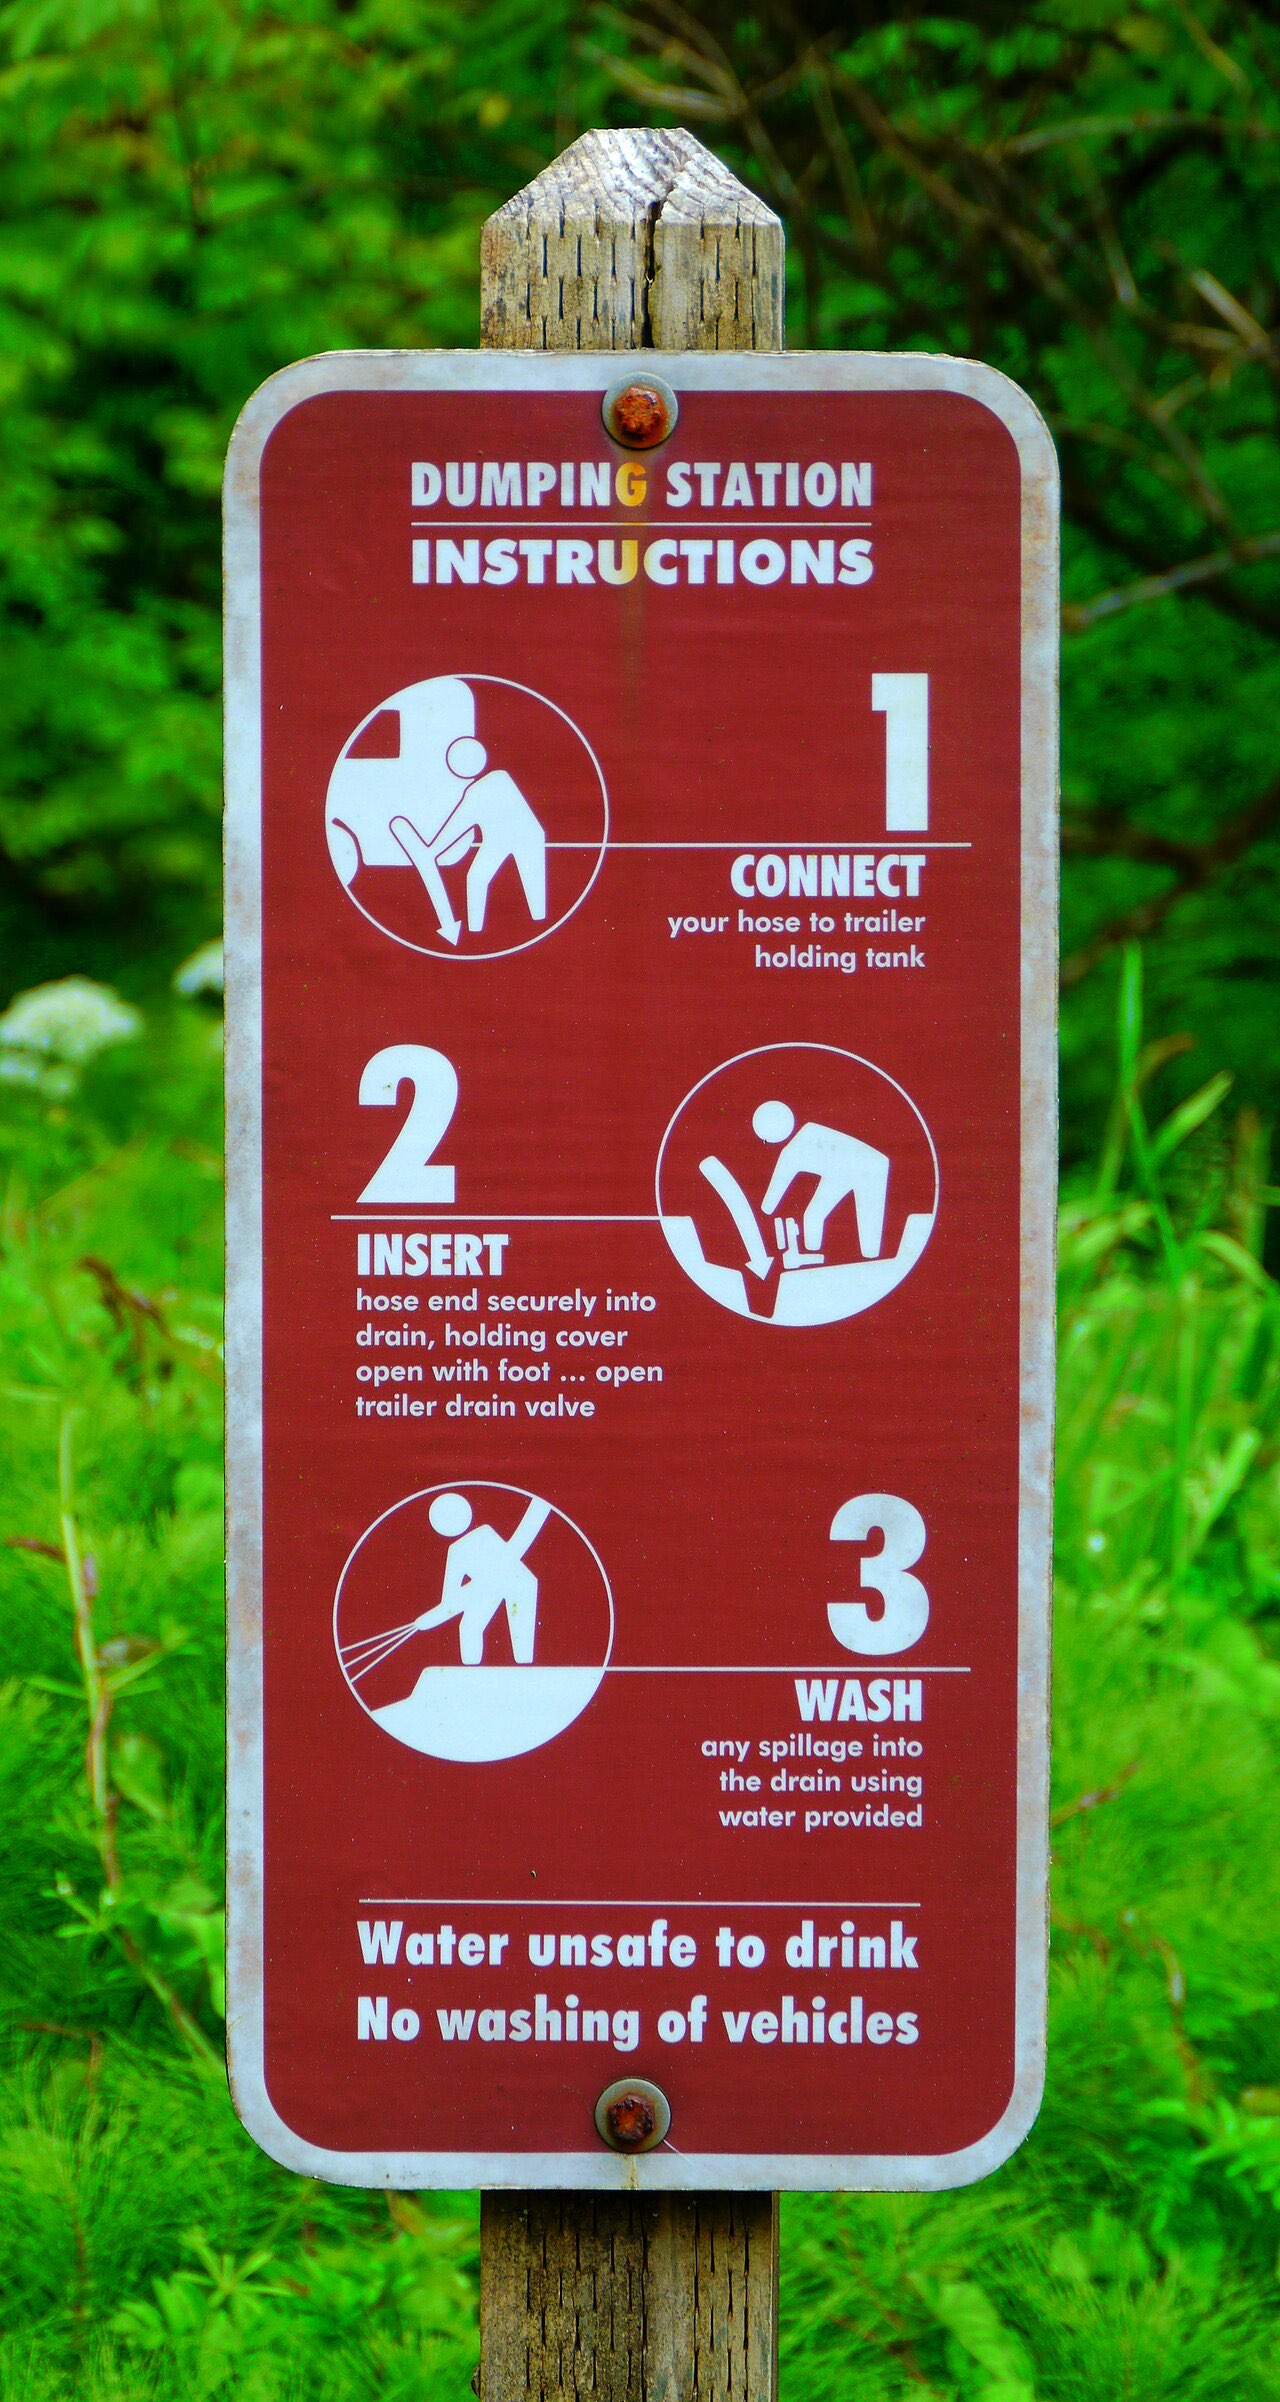
- Attach the sewer hose to the RV outlet with a quarter turn of the bayonet fitting, and fit the elbow or the plain end into the station drain. Carpinteria’s guide puts it plainly: ensure both ends of the hose are secure before you open the tank valve. Push the end four to six inches into the drain and weight it down, or hold the drain’s hinged cover down with your foot as the posted Oregon sign shows.
- Open the black tank valve fully. It is the larger (three-inch) valve, often marked. Stand clear of the hose connection for the first second. Watch the hose while it drains, which the guide also specifies; a hose that works loose under pressure is the classic dump-station disaster.
- When the flow stops, flush the black tank if your RV has a built-in flush fitting. Connect the station’s rinse hose (never your white drinking-water hose) to the flush inlet and run water for a few minutes until the clear elbow shows the flow running clear. Then close the black valve.
- Open the gray tank valve. Sink and shower water now runs through the hose and scours out the black-tank residue. Let it finish, then close the gray valve.
- Rinse the hose. While the drain end is still in the station inlet, disconnect the RV end and run the rinse hose through it from the RV end down, as the Carpinteria guide describes. Rinse the elbow and the ground around the drain; spills are cleaned up with dry methods only.
- Close both valves (check again), replace the outlet cap, stow the hose and elbow in their tub. Rinse the bay area if the station provides water for it.
- Add tank treatment and two or three gallons of water to the black tank through the toilet, so the next load does not land on a dry tank floor.
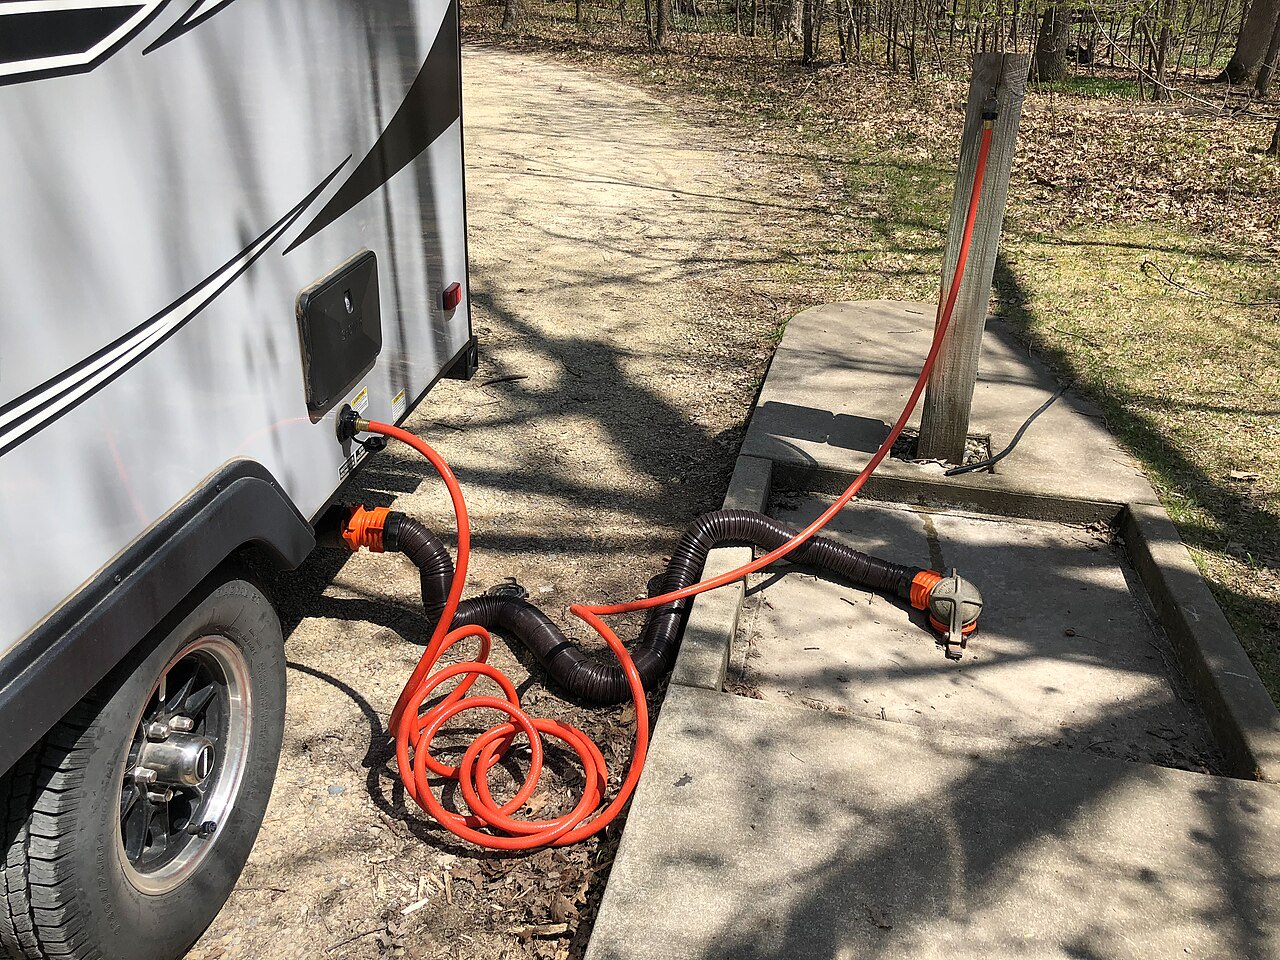
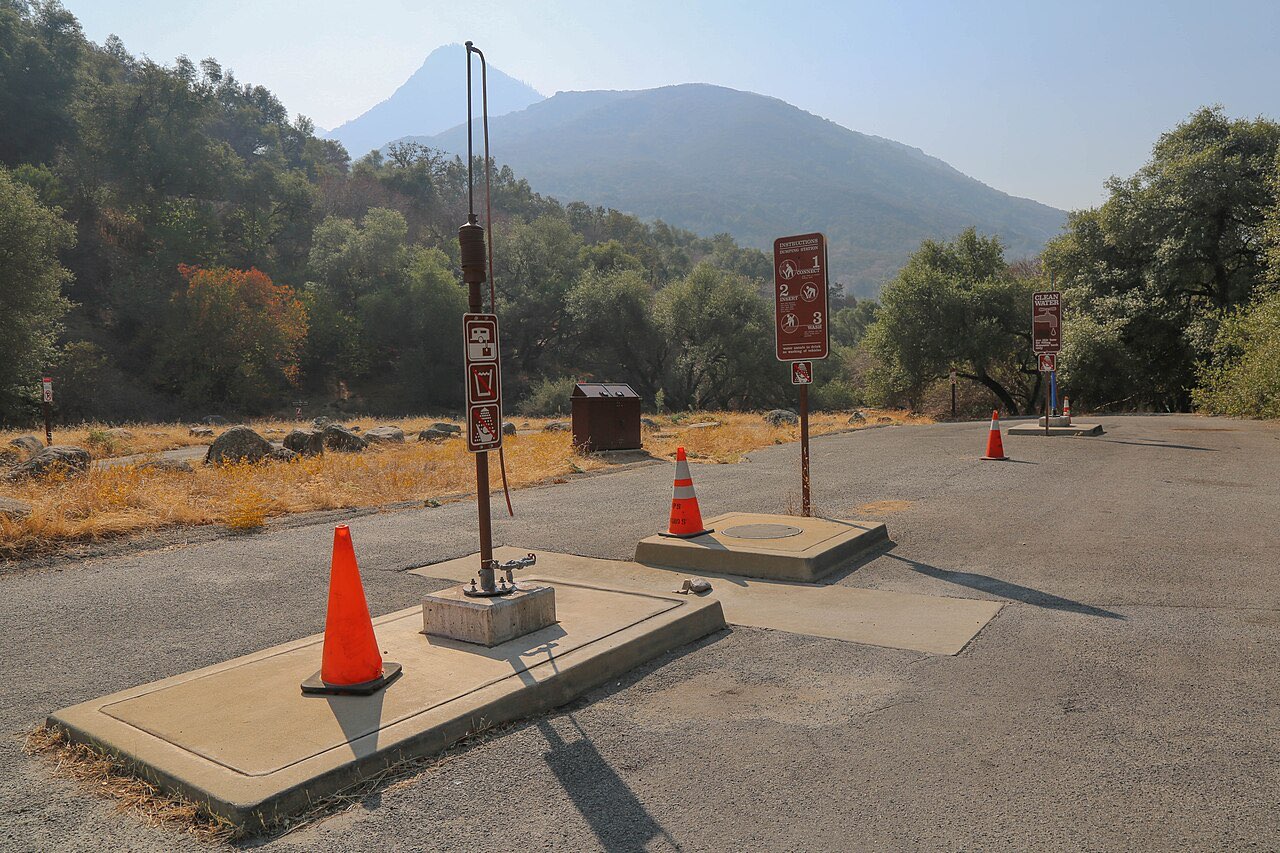
- Gloves off into the trash, sanitize your hands, and only then touch the potable water fill if you need it. Many stations put the potable spigot on a separate post some distance from the drain precisely so the two are never confused; the national park station pictured below is laid out that way.
The whole thing takes about ten minutes with a flush, less without. If someone is waiting behind you, skip the extra flush cycle; park etiquette treats the dump station like a fuel pump, not a parking spot.
Why black first and why a full tank drains better
The order is not a preference. Thetford’s manuals for its macerating dump systems specify black first, then gray, with the gray water used to rinse the hose afterward, and Carpinteria’s municipal guide repeats it. Black water is toilet waste; gray water is everything else. Running the gray through last means the hose you handle at the end has had thirty or forty gallons of soapy water pushed through it.
The second principle is that the black tank should be at least two-thirds full before you open it. A full tank drains with a head of water behind it that carries the solids out. A tank dumped every morning with a few inches in the bottom leaves a growing pile under the toilet that hardens, confuses the tank level sensors, and eventually needs a professional flush. That is also why, on a full-hookup site, the black valve stays closed between dumps and is only opened when the tank is full, while the gray valve can be left open or, better, closed and opened as needed so there is always rinse water available.
Where to find a dump station
Campgrounds. Nearly every developed campground with RV sites has one, free for registered guests. National park campgrounds that have them often close them in winter; Yellowstone’s campground page notes that dump stations may close when temperatures are below freezing. Our sister site’s park-by-park guides note which campgrounds have a station.
State rest areas, in some states. Oregon is the model: the state’s TripCheck rest-area page lists six rest areas with RV sanitary dump stations at no charge, including Charles Reynolds on I-84 east of La Grande (eastbound only), three on US 101 at Washburne, Tugman and Harris Beach state parks, Unity Lake on OR 245 and Clyde Holiday on US 26, the last open March through November. Other states have gone the opposite way: the Iowa DOT closed and sealed every rest-area dump station in 2023, citing illegal dumping and high maintenance costs, and now points RVers to private travel centers. Check the state DOT page for the state you are crossing rather than assuming.
Travel centers and fuel stations. Many of the large chains have a station around the back, usually for a fee or free with a fuel purchase.
Municipal wastewater plants and fairgrounds. Often free or a few dollars, with limited hours.
Apps and directories. Campendium and iOverlander both list dump stations with user-reported fees and status; the older Sanidumps directory now redirects elsewhere. Our RV campground apps guide covers which apps filter for dump stations and potable water, which is the same search you will run constantly if you take up boondocking.
What it costs
There is no standard fee. Public rest-area stations that still exist, like Oregon’s, are free. Your own campground’s station is free as a guest. Beyond that, the common pattern is:
| Where | Typical charge |
|---|---|
| State rest area with a station | Free |
| Campground where you are registered | Free |
| Private campground, non-guest | Commonly about $10 to $25, sometimes refused |
| Travel center / truck stop | Free to about $15, often waived with fuel |
| Municipal wastewater plant | Free to a few dollars, limited hours |
These are ranges from directory listings, not an official schedule; the posted sign or the app’s most recent report is the only number to rely on. Budget about one paid dump per week of travel if you move between non-hookup sites.
Tank chemicals: what they do and what to avoid
Tank treatments do two things: control odor and help break down solids and paper so the tank drains. Two notes:
- Enzyme and bacteria-based treatments are the default. Some dump stations connected to septic systems and some campgrounds prohibit formaldehyde-based products because they kill the bacteria the septic system relies on. If the label mentions formaldehyde or “formalin,” use something else unless you know the station is on a municipal sewer.
- Water matters more than chemicals. Most black-tank problems are dryness. Use plenty of water with every flush, keep two to three gallons in the tank after dumping, and use RV or septic-safe toilet paper that breaks down.
Household bleach in small amounts for a sanitizing cycle is a different job and belongs to the fresh-water system, covered in how to winterize an RV alongside the end-of-season tank drain.
What must never go down
Into the tank:
- Wipes, including those sold as flushable. They do not break down and are the leading cause of clogged black tanks and macerator pumps.
- Paper towels, feminine products, cotton swabs, dental floss.
- Kitchen grease, which solidifies in the gray tank and its valve.
- Automotive fluids, solvents, paint.
At the station:
- Trash into the drain. Stations close over this; Iowa’s did.
- Gray water onto the ground instead of the drain. It is a violation at every public station and in most jurisdictions.
- Washing the vehicle or your gear with the rinse hose. The Oregon sign pictured above says it directly: no washing of vehicles.
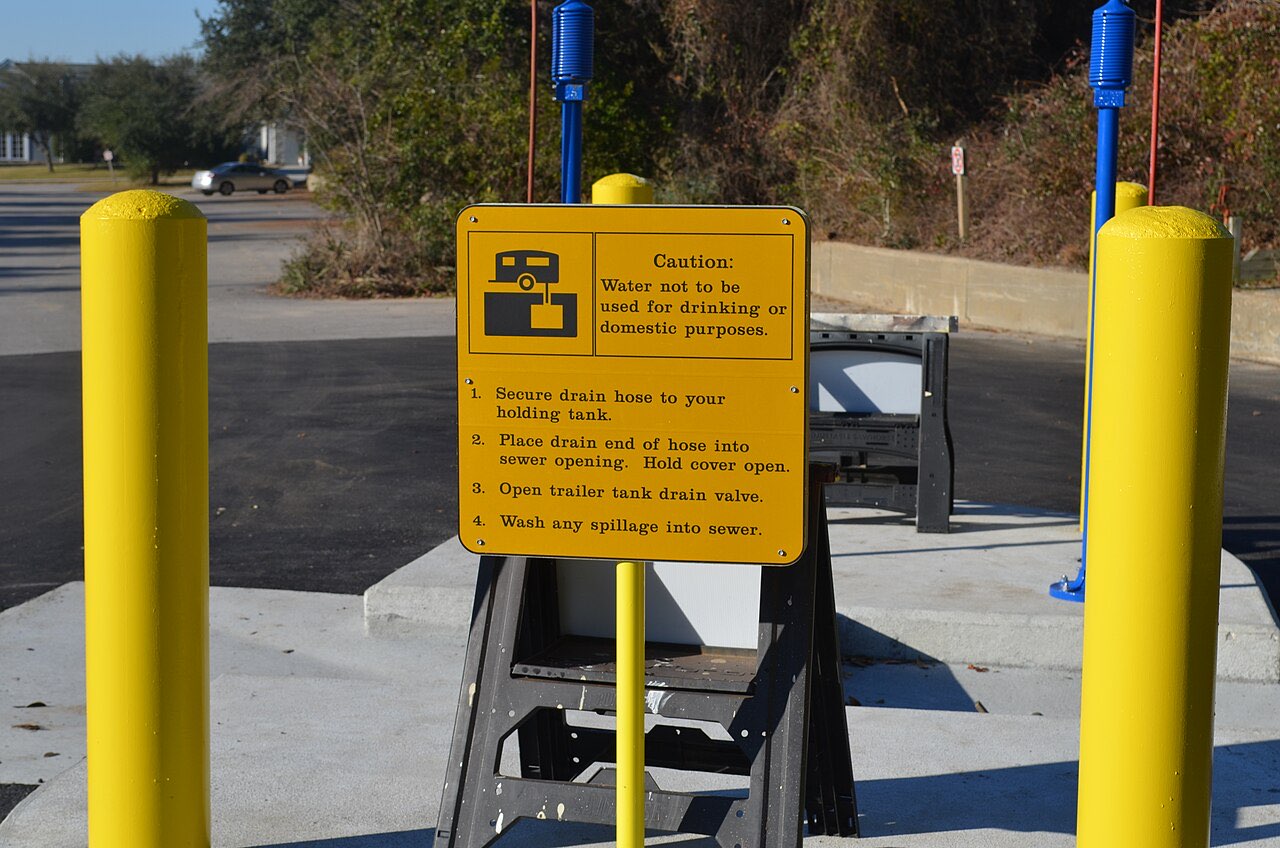
- Drinking-water hose anywhere near the drain. Keep white hose and rinse hose in separate tubs, and never fill fresh water from a spigot marked non-potable, which the signs at both pictured stations carry.
Full hookups: the dump station at your site
A full-hookup site is a private dump station at your own outlet. The procedure is identical except the hose stays connected, supported on a cradle with a steady downhill slope, and the valves do the scheduling: black valve closed until the tank is two-thirds full, then black, then gray, then close both. Leaving the black valve open on a sewer connection is the most common new-owner mistake, because the liquid drains and the solids stay; it is also how a sewer-gas smell gets into the coach, since the hose becomes an open vent to the park’s sewer. Use a sewer cap with a hose fitting at the park connection, and a hose with a built-in vent or a P-trap style elbow if odor persists.
Mistakes to avoid
- Opening a valve before both hose ends are secured. Every experienced owner has one story about this, and the fix is the first line of every official guide.
- Dumping gray first. You will handle a dirty hose.
- Leaving the black valve open on hookups. Solids stay, liquid leaves, and the sensors read full forever.
- Using the drinking-water hose to flush the tank or rinse the sewer hose. Buy a second hose in a different color and keep them in separate tubs.
- Dumping a nearly empty black tank “while you are here.” Wait until it is two-thirds full unless you are heading into storage.
- Skipping the water after the dump. A dry tank floor is where the pile starts.
- Blocking the station while you fill fresh water, walk the dog or make lunch. Dump, rinse, pull forward.
Station availability changes; Oregon’s list and Iowa’s closures above are as published in October 2026, and a station that was free last season can be closed or metered this one. Confirm on the state DOT page or a current app report before you plan a route around it, and if this is your first trip, our first RV trip planning guide schedules the first dump for a quiet weekday morning at your own campground, with nobody waiting behind you.
Frequently asked questions
Which tank do you dump first, black or gray?
Black first, then gray. The City of Carpinteria's RV dumping guide and Thetford's equipment manuals both give that order for the same reason: the gray water from sinks and showers flushes the solids and residue out of the sewer hose after the black tank has drained, so you disconnect a cleaner hose. Dumping gray first leaves the hose full of black-tank residue at the end.
How often should I dump my RV tanks?
When the black tank is at least two-thirds full, not on a schedule. A fuller tank drains with more force and carries solids out; a nearly empty tank dumped daily leaves a pile under the toilet that dries and builds up. On hookups, leave the black valve closed between dumps and open the gray valve only as needed, so you always have gray water to rinse with.
Where can I find free RV dump stations?
State rest areas in some states, state park campgrounds, many city sewage treatment plants and some fuel stations. Oregon's TripCheck lists six rest areas with free RV sanitary dump stations, for example. Others have closed theirs: Iowa DOT removed every rest-area dump station in 2023, citing illegal dumping and maintenance cost. Check a current directory such as Campendium or iOverlander and the state DOT page before counting on one.
How much does it cost to use a dump station?
Often free at public rest areas and the campground you are staying in. Private campgrounds, travel centers and some municipal sites commonly charge in the range of about $10 to $25 for non-guests, though there is no standard fee and listings change. The posted price at the station or the app listing is the only reliable number.
What should never go into an RV black tank or dump station?
Wipes of any kind including those labelled flushable, paper towels, feminine products, grease, household bleach in quantity, and automotive fluids. At the station itself, only tank contents and rinse water go down the drain: no trash, no gray water onto the ground, and no washing the vehicle with the rinse hose, which posted signs at Oregon and Virginia stations prohibit.
Keep planning
- 30 Amp vs 50 Amp RV Hookups Explained
30 amp vs 50 amp RV service explained: 3,600 vs 12,000 watts, what runs at once, dogbone adapters, pedestal testing and the voltage limits an EMS enforces.
Updated Oct 2026 - Boondocking for Beginners: Rules, Water and Power
Boondocking for beginners: BLM and Forest Service dispersed camping rules, 14-day limits, Motor Vehicle Use Maps, Leave No Trace, water and power budgets.
Updated Oct 2026 - First-Year RV Ownership Costs You Don't See at the Dealer
First-year RV ownership costs beyond the sticker: sales tax, registration, insurance, storage, hitch gear, tires, warranties and depreciation, with official figures.
Updated Oct 2026